How to take your new product from concept to prototype PART 1
If you’re in the early stages of planning a new product concept or idea, and you’re wondering what’s involved in getting it to market, it can help to understand the process.
In this article we aim to shed some light on the ‘bigger picture’ when taking a product from concept to prototype.
Cambridge Design Technology was asked to produce a concept design and working files for a new asthma metered dose inhaler (MDI) for a client. The requirement was not just to perform the required function but to be intuitive and easy to use.

Concept Phase
To turn your new product idea into reality, you need to brief your product designer on exactly what you want.
We say ‘exactly’, but this is often easier said than done.
So how do you convey to your designer all the details that will be needed in order to produce a first-stage concept visual?
The product design brief
The brief is one of the most important documents you’ll create during your product development process.
It’s a product requirements statement which defines its ‘form and function’ including:
- What the product is, how it will be used and by whom
- What it will do and how it will perform
- Its size, weight and aesthetics
- User interfaces as well as ergonomic and usability factors
- Cost of manufacturing and target selling price
- Intended manufacturing location
- Required time to market timescale
- Competitor products.
Working to the brief
Your design team will use the product design brief as a “set of rules” which may need to be followed specifically, or which may allow for a certain latitude. The job of a good product designer is to interpret the brief and come up with imaginative and creative ideas to address the requirements.
Going back to our asthma MDI requirement, the brief was broad enough to allow plenty of creative input for the design of simple, yet visually different aesthetic concepts.
Concept generation
We started by looking at what was currently available and created a theme board. This isn’t always necessary though, as ‘working blind’ can often give rise to more unique and original concepts.

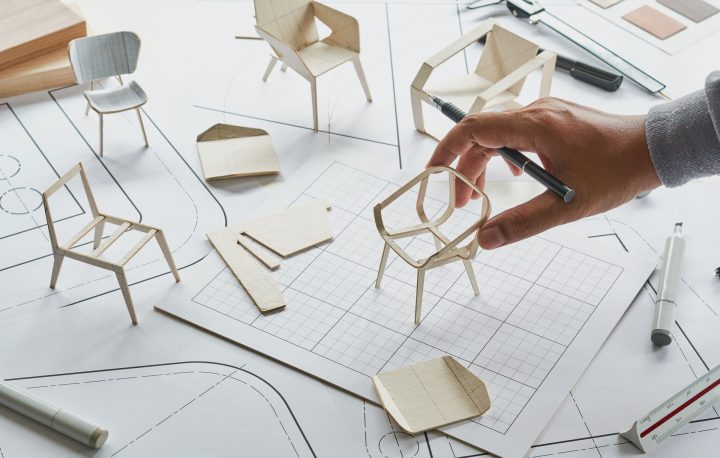
Next, we created a set of pencil sketches. During the concept generation cycle, we often produce a larger number of sketches before moving on to digital images and presentation to the client of our tangible concepts.
At this point, a concept is usually chosen to take forward, or in rare instances, we do a further round of concept images.
Concept development
The next stage is to develop the initial sketch into 3D geometry.
In the case of our inhaler product, the end goal was not yet to engineer a functional inhaler, but to display enough resolution in our product images to ensure the design could be manufactured beyond concept.
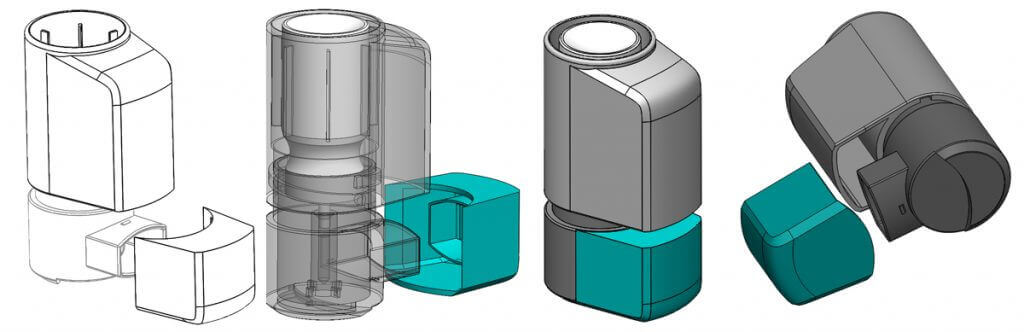
This is a key element of product design. Creating great looking designs that are unsuitable for manufacture is no use to anyone.
Concept rendering
Once agreed with the client that we’re on the right track, we can now start to harness the power of 3D geometry to produce:
- 3D prints
- CNC machined components
- Screen shots, diagrams for presentations and proposals
- Files to obtain estimates on injection mould and other manufacturing tools
- Line drawings for patent applications
- Photorealistic renderings.
Again, for our inhaler project, we created a set of first cut renderings, to give the client a firm idea of how the prototype will look.
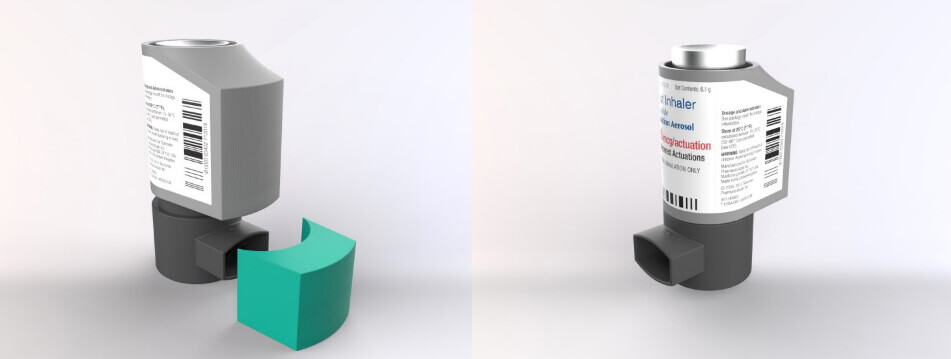
Some clients use this imagery at early stages for pre-marketing or presentation exercises, internal documentation, and in some instances, to create material for exhibitions.
Preparing for prototyping
On concept approval, the design team checks and prepares the design ready for manufacture.
Using our advanced CAD tools, we can look at any interference or clashes and minimum clearances, wall thicknesses, surface quality etc.
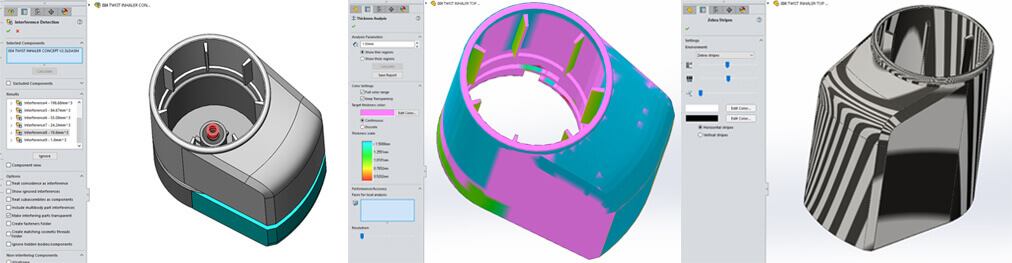
We then create an STL file – the triangulated file which is universally used in 3D printing – which is used to obtain prototyping quotes from our strategic partner Prototype Projects.

Clients often ask us to manage the prototyping process for them as part of our ‘one-stop’ product design service.
Just as with product design, the prototyping process requires a brief to answer questions such as:
- What will the prototype parts be used for?
- Will they be seen or used by 3rd parties?
- What finish is needed – perfect finish or raw 3D print?
- How many units are required?
- Will strength, robustness, electrical insulation or temperature resistance be tested?
Answers to these questions will determine what processes are used to create your prototype and how much it will cost.
Look out for our next article, where we’ll go into more detail about the prototyping stage.
For more information about Cambridge Design Technology and how we can work with you on your next product design project, please call Jon Plumb now on 01223 662300 or email info@cambridge-dt.com